

Christmas Sugar Cookie cut-outs decorated to look like Christmas trees—so easy! A small batch of cut-out sugar cookies decorated with a small batch of royal icing and sprinkles.

Last year, Camille was just beginning to grasp the concept of making cookies for Santa. She really enjoys the process of making cookies with me, but really, it’s more about the candy decorations than anything.
Last year, I realized that I didn’t have much of a game plan for Santa’s Christmas Eve snack, so I whipped up the easiest Christmas Sugar Cookies I knew. They’re all round with white frosting, and I zig-zagged some thin black icing across the cookies. I turned mini M&Ms sideways to resemble Christmas Lights. Behold, the easiest Christmas Lights Cookies ever.
You guys LOVE that recipe, and are still making it this year! I'm so glad!
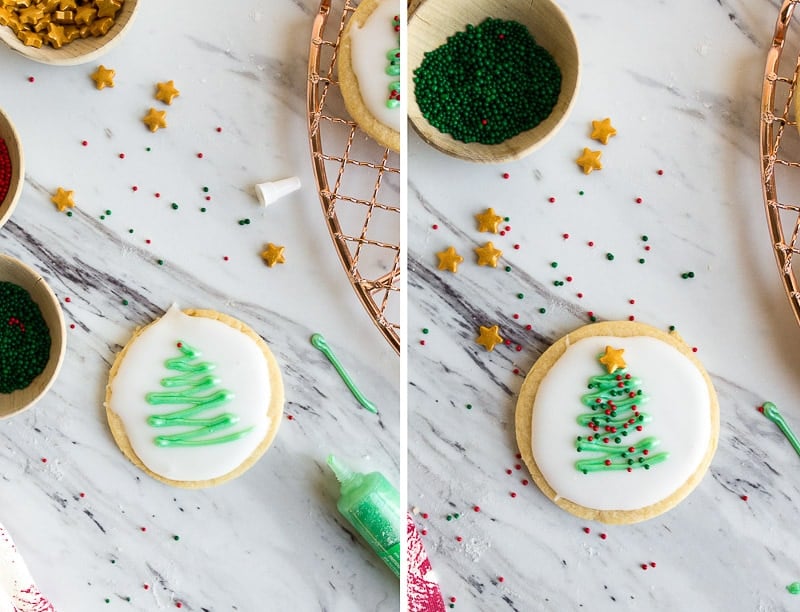
But, can I suggest another Christmas Sugar Cookie recipe that is just as easy? These Christmas tree cookies have a zig-zag of green icing, sprinkles on top, plus a big candy star on top.

Christmas Sugar Cookie Cut-Outs:
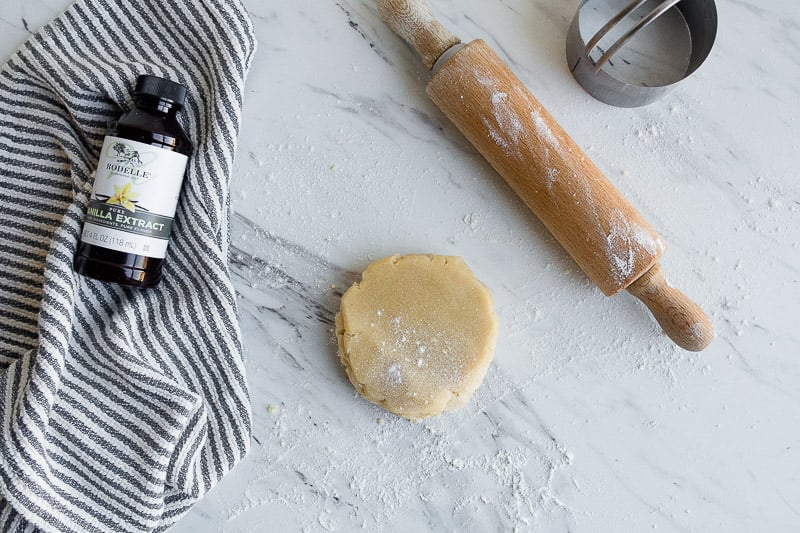
The base for these Christmas Cut Out Sugar Cookies is the same as last year—a round sugar cookie, cut with a 3" biscuit cutter. So, even if you don’t have any Christmas shaped cookie cutters, you can still make these cookies!
If your cutter is out, try my Tea Cakes, too!

The cookies are rich with the classic sugar cookie flavor, thanks to Rodelle’s vanilla extract. It perfumes the dough with a festive scent, and tastes delicious, too.
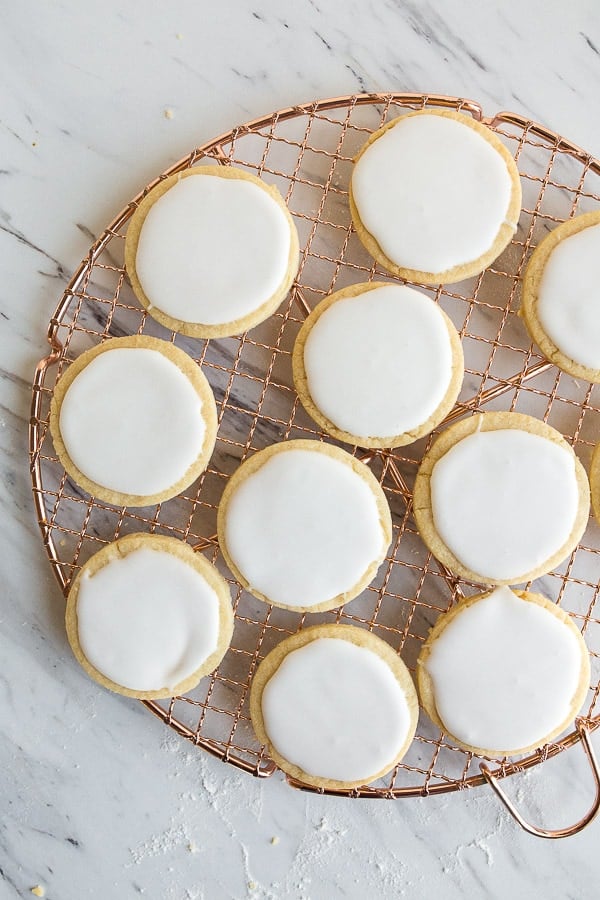
I made a small batch of royal icing to use on top of the cookies. I love royal icing because it’s smooth and dries perfectly flat. The matte white finish when it's dried allows any decorations on top to really shine. Plus, the Christmas sugar cookie recipe uses only egg yolks, and the royal icing uses the leftover egg whites!
I use a store-bought tube of shimmery green icing for the Christmas tree shape, but you can always divert some of the small batch royal icing and dye it green instead. Just place it in a piping bag and use the smallest round tip you can find. Then, I separate out my jar of non-non-pareil sprinkles into green and red, and I found a jar of large star sprinkles just for these cookies.
I can really see these cookies spinning off in so many directions. The blank white canvas allows you to draw anything on top—Christmas bells, holly leaves, a present, or a Christmas stocking! Camille wants to make a snowflake version next and pour edible glitter on top, because it’s been 6 months since she’s seen the movie Frozen, and her obsession is not showing sings of slowing down.
Baking Christmas cookies with kids:
This Christmas Sugar Cookie recipe makes a little over 1 dozen cookies. It’s the perfect amount for baking with kids, because I’ve found that they lose interest decorating cookies after about 6 cookies. Or, they just start eating the frosting and sprinkles straight-up, ignoring the actual cookies. This recipe will give you enough cookies for Santa’s plate, plus a few for everyone in the family to enjoy.

Sometimes I think baking with kids can be daunting in the kitchen, but a small-batch recipe is just perfect for children.
I use a mini rolling pin that fits little chubby hands in a small work surface. The mess should be minimal and contained in a small space!

If you kids are really little, you can make the cookies a day ahead, and store them in an air-tight container. If you think your kids would get bored waiting for icing to dry, you can ice the cookies with the small-batch royal icing ahead of time, too. Let it dry overnight. Then, on Christmas Eve, lay the cookies out in front of the kids and give them the green icing and sprinkles to decorate. This way, the kids get to do just the fun part of cookie decorating.
I linked to all of the sprinkles and baking tools in the recipe below, should you find yourself needing a mini rolling pin or the perfect star sprinkles on top. I hope you enjoy these cookies!

Christmas Sugar Cookie Cut-Outs

The cutest Christmas Sugar Cookie Cut-Outs. The simple Christmas tree cookie design is great for baking with kids. No chill time required!
Ingredients
For the sugar cookie cut-outs:
- 1 ½ cups flour, plus extra for rolling
- 1 teaspoon baking powder
- pinch of salt
- ½ cup unsalted butter, softened
- ½ cup granulated sugar
- 2 large egg yolks (save the whites for the frosting)
- 1 teaspoon Rodelle vanilla extract
For decorating:
- 2 cups powdered sugar
- 1 tablespoon freshly squeezed lemon juice
- 2 large egg whites
- 1 tube green frosting with small tip
- red and green nonpareils sprinkles
- star sprinkles
Instructions
- In a small bowl, whisk together the flour, baking powder and salt.
- In a medium bowl, beat together with an electric mixer the butter and sugar. Once light and fluffy, add the egg yolk and vanilla extract.
- Once well incorporated, sprinkle over half the flour mixture and beat gently until combined, then sprinkle over the rest. Beat until no streaks of flour remain, but be careful not to over-mix.
- Dust a clean counter top with flour, and dump half of the dough out onto it. Gather it into a ball and press it into a ½" thick round disk. Flour your rolling pin, then roll out the dough out big enough to cut out about 8-9 shapes. Place the shapes on a baking sheet lined with parchment paper or a silicone mat. Gather the dough scraps and re-roll to cut out 8-9 more shapes and place them on the cookie sheet. You should get roughly 16 cookies.
- Place the cookie sheet in the freezer for the minutes while you preheat the oven to 350.
- Once the oven is hot, bake the cookies for 10-12 minutes, until the edges of the cookies just start to turn brown. Let them sit on the sheet a few minutes before moving them a wire rack to cool completely.
- Once the cookies are cooled completely, make the royal icing: in a small bowl, combine the powdered sugar and lemon juice.
- Beat the egg white in a small bowl to loosen them, and then measure out 2 tablespoons of egg whites and add them to the bowl with the sugar.
- Whisk together the icing, starting slowly, and trust that the sugar will melt and it will become liquid. Resist the urge to add any more liquid to the bowl, and instead just keep whisk slowly.
- When the icing comes together, spoon a small amount onto each cookie, and use an off-set spatula to spread it almost to the edges.
- Let the royal icing harden completely on the cookies before proceeding.
- Using the green frosting tube, make a zig-zag Christmas tree shape in the center of a cookie. Immediately add the nonpareil sprinkles and press a star candy on top. Because the royal icing is already dry, the sprinkles will only stick to the Christmas tree shape. Repeat with all remaining cookies.
Notes
Cookies will keep for up to 3 days in an air-tight container at room temp.
Nutrition Information:
Yield:
16Serving Size:
2Amount Per Serving: Calories: 195Total Fat: 7gSaturated Fat: 4gTrans Fat: 0gUnsaturated Fat: 3gCholesterol: 50mgSodium: 59mgCarbohydrates: 30gFiber: 0gSugar: 21gProtein: 3g


Sandra says
Last year's Christmas Lights cookies were so quick and simple yet so well received that I didn't think I could go back to my usual time-consuming cookie decorating this year. Well, thank you very much for another great idea! I hope this will be an annual tradition for your readers!
Victoria says
I'm not sure about the egg white, would you recommend another type of ingredient, like meringue powder?
Christina Lane says
I hear ya, Victoria. Especially when cooking for kids! You can definitely use meringue powder, though you may have to add more lemon juice to bring the frosting together. Or, follow the directions on the package to make the 'egg white.' Let me know how it goes :)
Michelle says
These cookies look absolutely delicious and festive! On another note: do you think countertop conventional ovens (those tiny toaster ovens) are for two friendly? I use the oven a lot for cooking and baking and it seems like heating up the big ol' oven seems like a waste of energy and also takes up a lot more time.
Christina Lane says
I do think they would work, Michelle! And good news: You can expect more toaster oven recipes in January :)
sharon says
I use a countertop convection oven all the time for Christina's recipes. It works great.
pikbee says
The decor is so cute and it looks easy enough for a clumsy girl like me. Thank you for sharing!
Kristin says
Never was able to get the royal icing to convert. No matter the speed, whether slow or fast it just always maintained little balls of clumps. I think the key is to gradually add the powdered sugar into the egg whites. I like the decorations but onto the next Christmas cookie recipe unfortunately.
Christina Lane says
It takes a shockingly long time to get it to work. If after 5-7 minutes of stirring, you're still uncertain, you can add a splash more lemon juice. Beyond that, break out the hand mixer!
Susan DeWitt says
Once completely dry, can the cookies be frozen? Your decorating is wonderful.
Susan D
Christina Lane says
Yes, Susan! I've frozen them successfully :)
Cheryl Ricks says
I am not much of a cookie baker, but I like to make pies and Pecan is my favorite, however every time I make one the crust splits and the filling runs and sticks to the bottem of the pie plate making it almost impossible to get the slices out with any crust on the bottom. What am I doing wrong and how can I correct this?
Christina Lane says
Hi Cheryl,
It sounds like your crust is to blame! It might be too thin on the bottom, or you might stretching it too much when you're putting it in the pan. You might try sprinkling a light coating of cornmeal over the bottom crust before pouring in the pecan pie filling, too. that can help make sure the crust sticks to the filling and comes out cleanly. Good luck :)
Caroline says
These are th best sugar cookies I have ever made! Definitely making these again!! I made them with a different frosting: https://simplesweetrecipes.com/4-ingredient-powdered-sugar-frosting/
Suzanne says
These look delicious! Thank you for sharing!
Karma says
Does this icing get firm like royal icing? I’m wondering how well these will hold up to stacking in a gift box.
Christina Lane says
Yes, let dry 24 hours before stacking.