

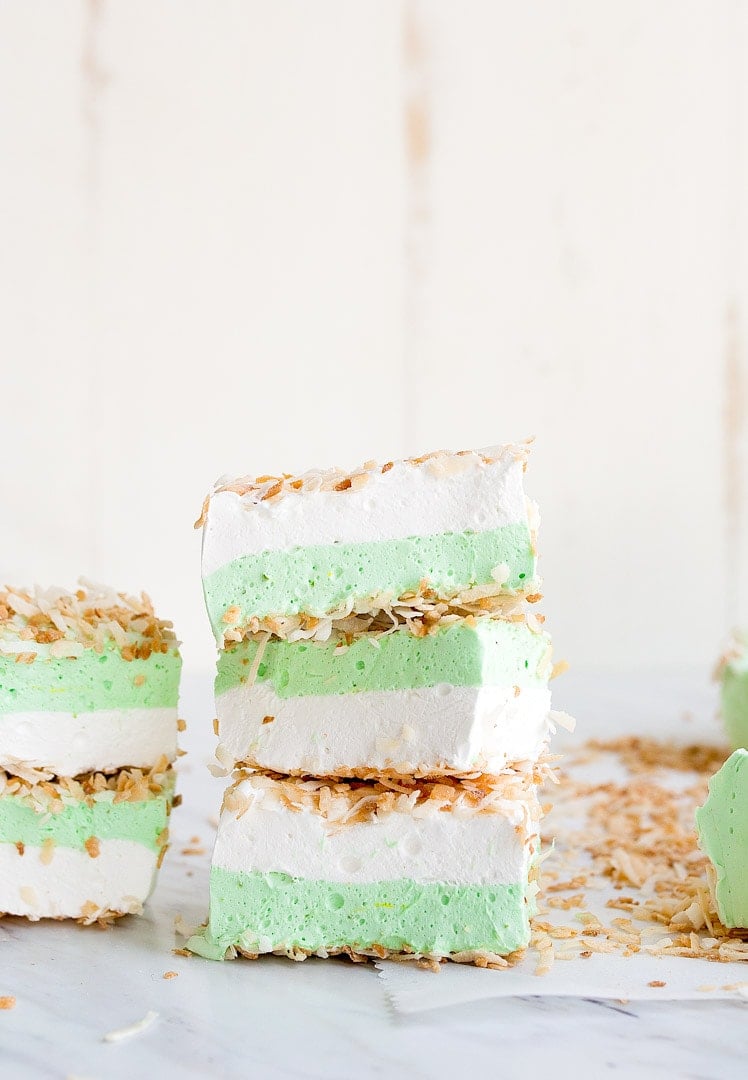
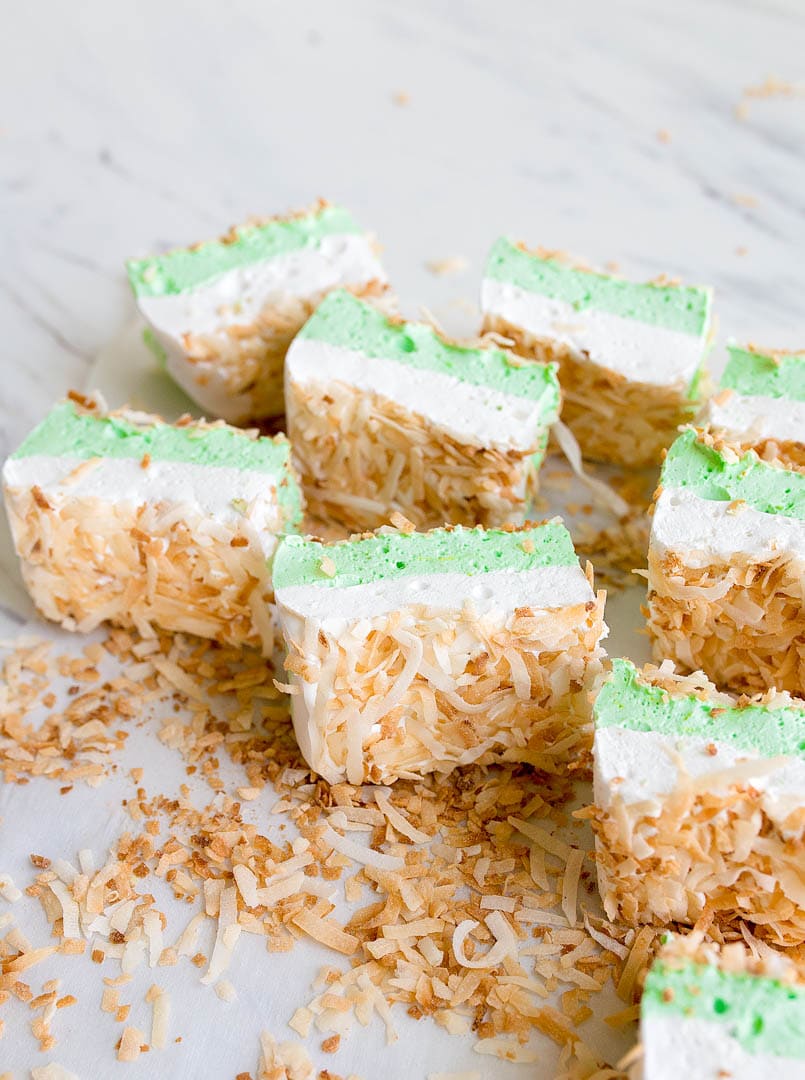
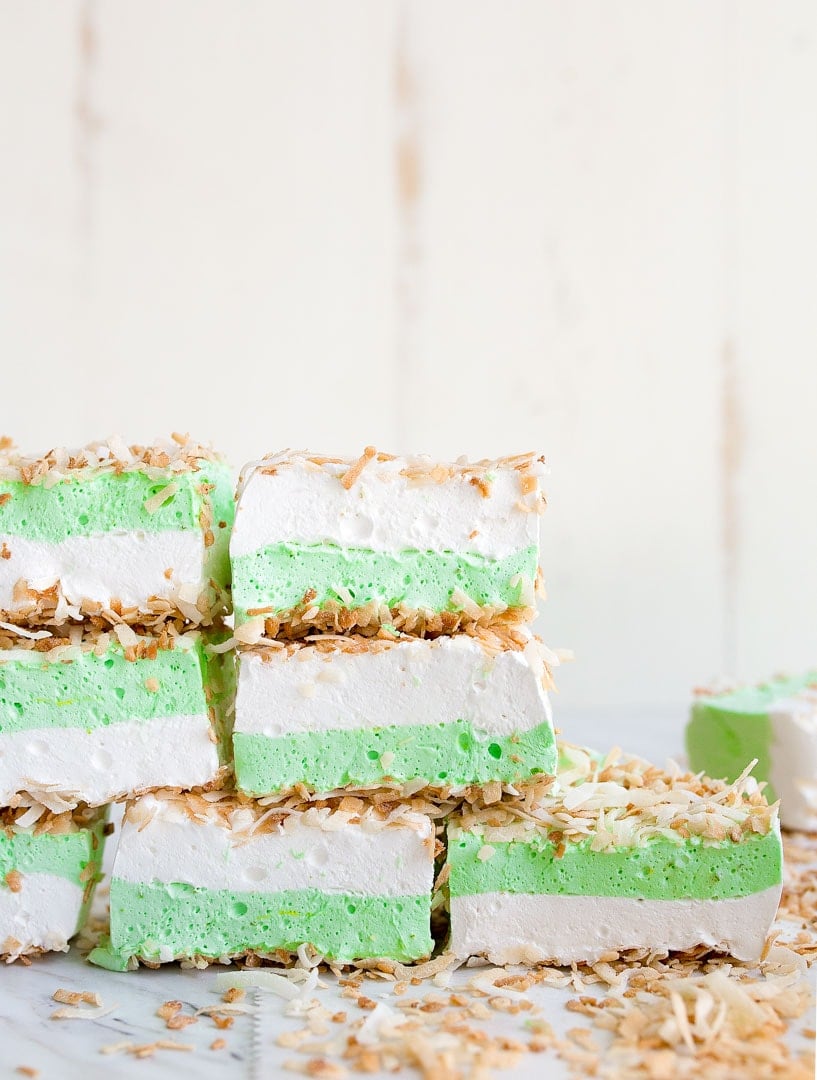
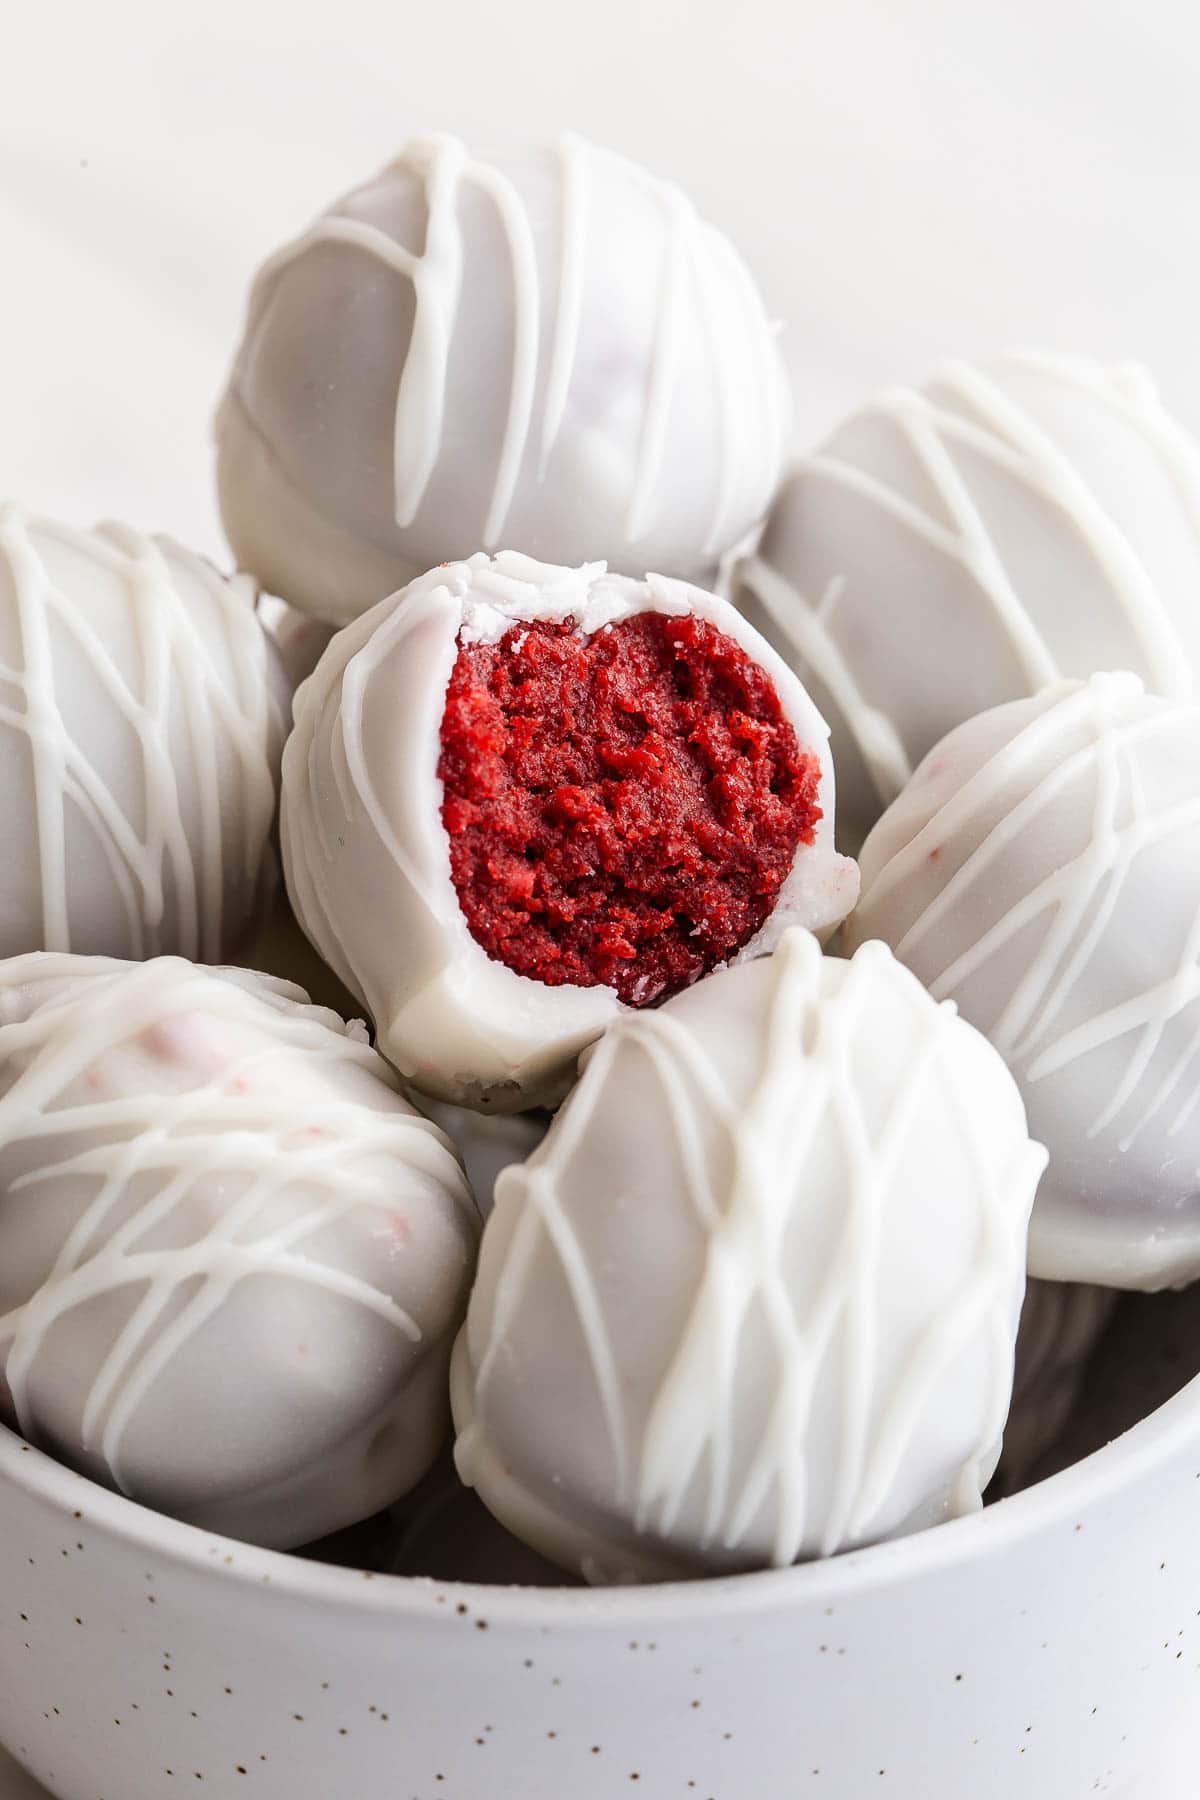
Toasted coconut marshmallows with a lime marshmallow layer. This post is sponsored by Vital Proteins, makers of my favorite protein powder, collagen peptides, and grass-fed beef gelatin!
Thank goodness it's s'mores season!
We recently moved into a neighborhood that celebrates all things with s'mores. Our neighborhood has fire pits all throughout the common areas, and when the weather is nice, you can almost always count on several fires going. If there's a festival in one of the parks, extra fire pits are brought in for extra s'mores. It's just part of the culture here.
I've been caught more than once without s'mores supplies for an impromptu s'mores date invitation, to which the neighbors who have lived here longer say 'you must be new here!' It's such a rookie move.
I now constantly stock s'mores supplies in my pantry so that when the mood strikes us (at least once a week), we're ready to go. And while my pantry has the usual s'mores necessities, I have to admit--bagged marshmallows aren't my favorite.
My opinion is that everyone on earth walks around thinking bagged marshmallows are delicious until they have a homemade marshmallow. Homemade marshmallows are a completely different thing than store-bought marshmallows. It's hard to even compare them. Eating just one homemade marshmallow will change your opinion on marshmallows forever. They're powerful stuff.
Store-bought marshmallows have a thick outer layer (or crust) and are gooey and sticky inside. Homemade marshmallows do not have a crust and are smooth and spongy/fluffy throughout. They often come in much more exciting flavors, like toasted coconut marshmallows with a lime marshmallow layer on top! (I also have chocolate-dipped chocolate marshmallows, matcha marshmallows, and raspberry marshmallows, if you're interested!)
Side note: if you want your homemade marshmallows to taste like store-bought, you can leave them uncovered on the counter for a day, and they will develop that characteristic crust on the outside. It's delicious!
Anyway, I like bringing homemade marshmallows to s'mores parties because they instantly spark a conversation about baking (which is my favorite thing to talk about, you might have guessed). They're also inherently impressive, especially when they're two-tone like these!
I get a lot of questions about how to make my small batch of homemade marshmallows, and so I thought I would go over it. It's a 20 minute process to make marshmallows from start to finish. They take about two hours to set on the counter, but the actual cooking part is so quick! Don't get too excited, though, the clean-up is a pain, hah! Just being honest here.
How to make toasted coconut marshmallows:
- Toast the sweetened coconut flakes and set aside.
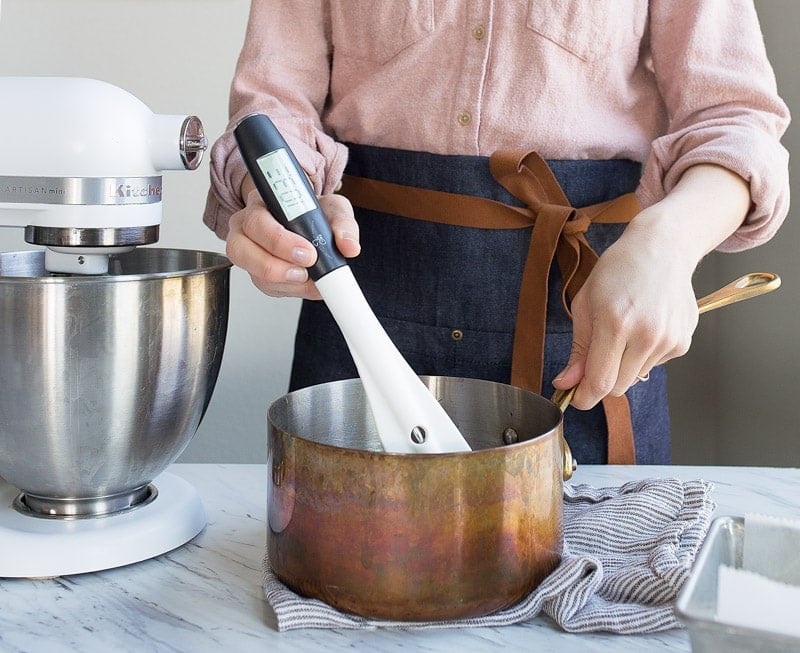
- To a medium saucepan, add the granulated sugar, light (clear) corn syrup, and water. Boil until the temperature reaches 237-degrees F.
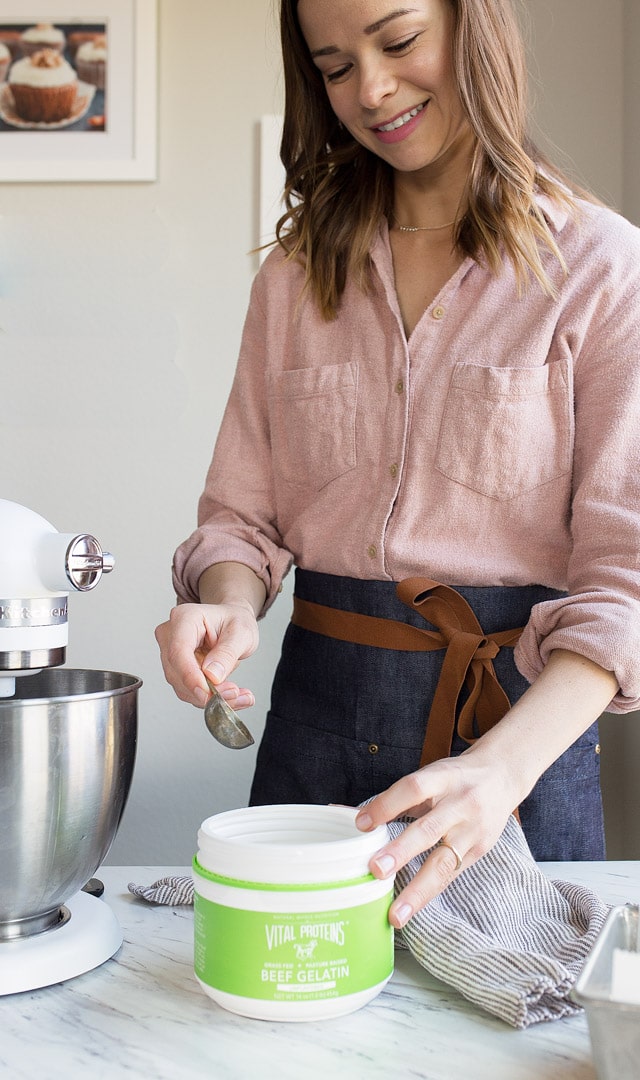
- Meanwhile, combine 1 tablespoon of gelatin in 3 tablespoons of water in a mini stand mixer.
- Stream the 237-degree sugar mixture into the gelatin mixture slowly while the mixer is running. Be careful not to splash the hot sugar on the sides of the bowl while pouring because it hardens immediately.
- Beat until fluffy and white, about 5 minutes or longer. That's it!
You can use any type of powdered gelatin to make these toasted coconut marshmallows, but I reach for my Vital Proteins grass-fed beef gelatin because I'm always trying to get more collagen and gelatin into my diet. These protein sources help improve digestion, strengthen joints, ligaments and tendons, and benefits hair, skin and nails (source).
I'm always looking for ways to ingest it beyond my hot coffee, including using it for homemade fruit snacks.
Equipment for leaning how to make homemade marshmallows:
- You need an electric mixer, either hand-held or a super cute mini stand mixer. The stand mixer takes about half the time to whip the marshmallows.
- My absolute favorite tool for making homemade marshmallows is this spatula with a built-in thermometer (pictured above). You definitely need a thermometer for making marshmallows, and this one makes it so easy because it's your stirring tool.
- I use a loaf pan to make a small-batch of homemade marshmallows, but you may absolutely double this recipe and pour it in an 8x8" pan or 9x9" pan. Sometimes, if you're going to through the effort of making something, you want more of a result. I get that.
Okay, I think you're all set up for making homemade toasted coconut and lime marshmallows. Your s'mores will never be the same!
Toasted Coconut and Lime Marshmallows (with lime!)
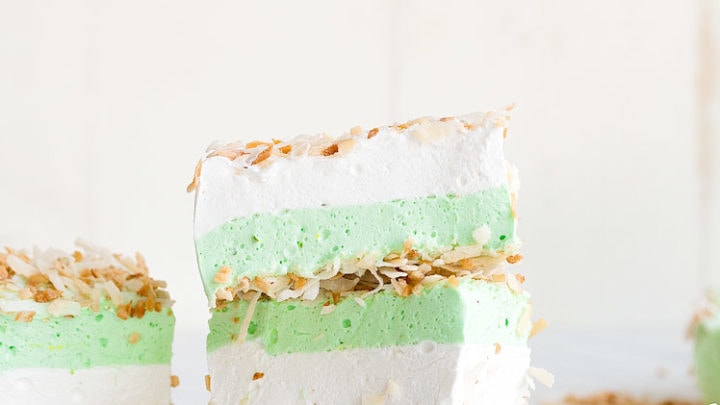
Toasted coconut marshmallows with a creamy lime marshmallow layer.
Ingredients
- For the toasted coconut layer:
- 1 cup sweetened coconut shreds
- ¾ cup granulated sugar
- ⅓ cup light (clear) corn syrup
- pinch of salt
- 6 tablespoons cool water
- 1 tablespoon Vital Proteins grass-fed beef gelatin
- ½ teaspoon coconut extract
- For the lime marshmallow layer:
- ¾ cup granulated sugar
- ⅓ cup light (clear) corn syrup
- pinch of salt
- 6 tablespoons cool water
- 1 tablespoon Vital Proteins grass-fed beef gelatin
- zest of 1 lime
- 1 drop green food coloring, optional
Instructions
- In a small skillet, toast the coconut until lightly golden brown. Stir often to prevent burning.
- Line a 9x5" bread loaf pan with parchment paper in both directions (spray any exposed edges with cooking spray). Spread half of the toasted coconut on the bottom of the pan, and reserve the rest for the top.
- Next, make the toasted coconut marshmallow layer: In a medium sauce pan, stir together the granulated sugar, corn syrup, salt, and 3 tablespoons of the water. Turn the heat to high and bring to a boil without stirring much. Clip a candy thermometer to the edge of the pan (or use my spatula with a built-in thermometer to stir occasionally, and boil until it reaches 237-degrees Farenheit.
- Meanwhile, add the remaining 3 tablespoons of water to a large bowl (or the bowl of a stand mixer) and sprinkle the gelatin on top. Let sit for a few minutes without stirring.
- When the sugar syrup reaches 237, slowly begin to stream it into the gelatin mixture while constantly beating with a hand mixer (not a stand mixer). Do not splash the syrup on the edges of the bowl, or it will harden immediately. Go slow, and take your time.
- Beat the mixture for 5-10 minutes, until it looks like marshmallow fluff and is fluffy and white.
- Beat in the coconut extract at the last minute.
- Spread the mixture into a 9 x 5" loaf pan that has been lined with parchment paper and greased very well with either cooking spray, butter or oil.
- Let the mixture set while you clean and dry your equipment to make the lime layer: In a medium sauce pan, stir together the granulated sugar, corn syrup, salt, and 3 tablespoons of the water. Turn the heat to high and bring to a boil without stirring much. Clip a candy thermometer to the edge of the pan (or use my spatula with a built-in thermometer to stir occasionally, and boil until it reaches 237-degrees Farenheit.
- Meanwhile, add the remaining 3 tablespoons of water to a large bowl (or the bowl of a stand mixer) and sprinkle the gelatin on top. Let sit for a few minutes without stirring.
- When the sugar syrup reaches 237, slowly begin to stream it into the gelatin mixture while constantly beating with a hand mixer (not a stand mixer). Do not splash the syrup on the edges of the bowl, or it will harden immediately. Go slow, and take your time.
- Beat the mixture for 5-10 minutes, until it looks like marshmallow fluff and is fluffy and white.
- Beat in the lime zest at the last minute.
- Spread the mixture on top of the coconut layer, and sprinkle the remaining toasted coconut shreds on top immediately.
- Let the whole pan set for at least two hours before slicing into 8 big marshmallows.
Nutrition Information:
Yield:
8Serving Size:
1Amount Per Serving: Calories: 399Total Fat: 10gSaturated Fat: 7gTrans Fat: 0gUnsaturated Fat: 2gCholesterol: 19mgSodium: 134mgCarbohydrates: 70gFiber: 3gSugar: 57gProtein: 10g

Catherine says
Can you still make them with out a hand mixer ? All I have is a stand mixer.
Christina Lane says
Yes, you can, Catherine! They'll take about 10 minutes with a hand-mixer, and it the motor of the hand mixer will get pretty hot. Take breaks, if needed. If the hand mixer is old, it might not work. Make sure it's a new powerful model :) Good luck (and let me know!) :)
dannie says
Lovely dessert.thanks for sharing the recipe.